
The Complete Guide to Changing Plumbing Pipes
Changing plumbing pipes is one of the most important — and often most overlooked — home maintenance projects you can tackle. Here’s a quick overview of what the process involves:
Quick Answer: What Does Changing Plumbing Pipes Involve?
- Identify the problem – Look for leaks, discolored water, low pressure, or pipes over 50 years old
- Choose your pipe material – PEX, copper, PVC, or CPVC depending on your budget and needs
- Shut off the water supply – Always before any pipe work begins
- Remove old pipes – Cut out and disconnect damaged or aging sections
- Install new pipes – Connect with proper fittings and secure in place
- Test for leaks – Slowly restore water pressure and inspect all joints
- Restore walls and finishes – Patch any access points opened during the job
Your home’s plumbing works quietly behind the walls every single day — until it doesn’t. Most homes have pipes that are decades old, and materials like galvanized steel and old copper don’t last forever. Galvanized steel pipes can fail in as little as 20 years. Even copper, one of the more durable options, has a lifespan of around 70-80 years and can corrode in homes with acidic water. When pipes start to go, the damage can be costly: water stains, mold, low pressure, and even contaminated drinking water.
The good news? Modern materials like PEX (cross-linked polyethylene) have transformed what repiping looks like for homeowners. PEX is flexible, corrosion-resistant, and far easier to install than rigid copper — making it the go-to choice for both professional plumbers and informed DIYers today.
I’m Tyler Steiner, CEO and founder of Prime Heating & Cooling, and after years of hands-on experience with residential and commercial plumbing systems across New England, I’ve seen how proactive changing plumbing pipes can protect a home’s value and prevent costly emergencies. In this guide, I’ll walk you through everything you need to know — from spotting the warning signs to choosing the right materials and deciding when to call a pro.

Easy changing plumbing pipes glossary:
When we talk about changing plumbing pipes, we aren’t just talking about fixing a single leak under the kitchen sink. We are talking about the integrity of your home’s “circulatory system.” Just as your body relies on clear arteries to function, your home in Rhode Island relies on clean, sturdy pipes to deliver water and remove waste.
Choosing the right material is the first hurdle. In our 20 years of experience serving areas from Providence to East Greenwich, we’ve seen every type of pipe imaginable. Some have stood the test of time, while others have become cautionary tales.
| Pipe Material | Expected Lifespan | Pros | Cons |
|---|---|---|---|
| PEX | 40–100+ Years | Flexible, freeze-resistant, no soldering, corrosion-proof. | Cannot be used outdoors (UV sensitive). |
| Copper | 70–80 Years | Durable, fire-resistant, recyclable, biostatic. | Expensive, can corrode in acidic water, prone to theft. |
| PVC | 25–40 Years | Cheap, easy to install, great for waste lines. | Brittle over time, not for hot water supply. |
| CPVC | 10–25 Years | Handles hot water better than PVC. | Becomes very brittle with age; reduced warranties. |
| Galvanized Steel | 20–50 Years | Very strong. | Internal rust/buildup, narrows over time, high failure rate. |
| Cast Iron | 75–100 Years | Quiet, extremely long-lasting for drainage. | Heavy, difficult to cut, internal “scaling” or rusting. |
Copper: The Old Gold Standard
Copper was the king of plumbing from the 1950s through the early 2000s. It’s a fantastic material because it’s naturally antimicrobial and can last a century in the right conditions. However, it’s expensive. In recent years, the cost of copper has skyrocketed, often running between $4 and $12 per linear foot. It also requires an open flame (soldering) to install, which carries a fire risk during the changing plumbing pipes process.
PEX: The Modern Champion
PEX (cross-linked polyethylene) has taken the industry by storm. It’s a flexible tubing that can be snaked through walls like electrical wire, which means fewer holes in your drywall. Because it uses fewer fittings (elbows and joints), there are fewer places for a leak to start. In our local climate—where Johnston or Smithfield winters can get brutal—PEX is a lifesaver because it can expand slightly if water freezes inside, making it much less likely to burst than rigid copper.
PVC and CPVC
PVC is the go-to for “DWV” (Drain, Waste, and Vent) systems. If you are replacing a cast iron sewer line, PVC is the lightweight, 100-year solution. CPVC is a treated version used for supply lines, but we often see it become brittle in older Rhode Island homes, leading to cracks if bumped.
Galvanized and Cast Iron
If your home was built before 1960, you likely have these. Galvanized steel pipes are essentially a ticking time bomb of rust. Cast iron is great for muffling the sound of rushing water in drains, but once it starts to corrode from the inside out, it needs to be swapped for PVC.
Recognizing Signs You Need to Start Changing Plumbing Pipes
How do you know if your pipes are “crying out for retirement”? Sometimes the signs are obvious, like a geyser in the basement, but often they are subtle.
- Low Water Pressure: If your morning shower feels more like a light drizzle, your pipes might be narrowed by internal rust or mineral scale. This is especially common with galvanized steel.
- Discolored Water: Does the water look “rusty” or brown when you first turn on the tap after a weekend away? That’s iron oxide leaching into your drinking water.
- Frequent Leaks: If you’re calling us for a “spot repair” every few months, the system is telling you it’s exhausted. One leak is an accident; three leaks are a pattern.
- High Water Bills: An unexplained spike in your utility bill often means a “silent” leak is occurring behind a wall or under your foundation.
- Noisy Pipes: Banging, whistling, or chattering (often called “water hammer”) can indicate that pipes have come loose from their moorings or are experiencing pressure imbalances.
- Foul Odors: Sewer smells in the house often point to cracked cast iron vent stacks or dried-out PEX traps.
If you aren’t sure where the issue is coming from, you can learn how to troubleshoot plumbing issues in 5 simple steps to narrow it down before calling in the experts.
Repair vs. Replace: When Changing Plumbing Pipes is Necessary
We often get asked: “Can’t you just patch it?” While we love a good repair, there are times when changing plumbing pipes entirely is the only responsible move.
When to Repair:
- The leak is in a single, accessible location (like under a sink).
- The rest of the plumbing system is relatively new (less than 20 years old).
- The pipe material is still in good condition with no signs of widespread corrosion.
When to Replace:
- Pipe Age: If you have galvanized steel pipes, they have reached the end of their 20–50 year lifespan. If you have copper nearing 70 years, it’s time to plan.
- Widespread Corrosion: If we see “pitting” or green crusty buildup on multiple joints, the metal is failing system-wide.
- Polybutylene Risks: If your home was built in the 80s or 90s and has grey plastic pipes, these are known as polybutylene. They are notorious for sudden, catastrophic failure and should be replaced immediately.
- Lead Service Lines: Safety first. If your main water line is lead, it must be replaced to protect your family from heavy metal poisoning.
For a deeper dive into the decision-making process, check out The Homeowner’s Guide to Repiping or this expert breakdown on Replacing Pipes: When to Repair vs. Replace.
The Step-by-Step Process of Repiping a Home
If we determine a full repipe is necessary for your Warwick or Coventry home, here is what the “surgical” process looks like.
1. The Water Shutoff and Drainage We start by turning off the main water valve. We then open the lowest faucets in the house to drain every drop of water out of the existing lines. This prevents a mess when we start cutting.
2. Strategic Access Instead of tearing down every wall, we make small, strategic “windows” in the drywall. Because PEX is flexible, we can often “fish” the new lines through the floor joists and wall studs with minimal damage.
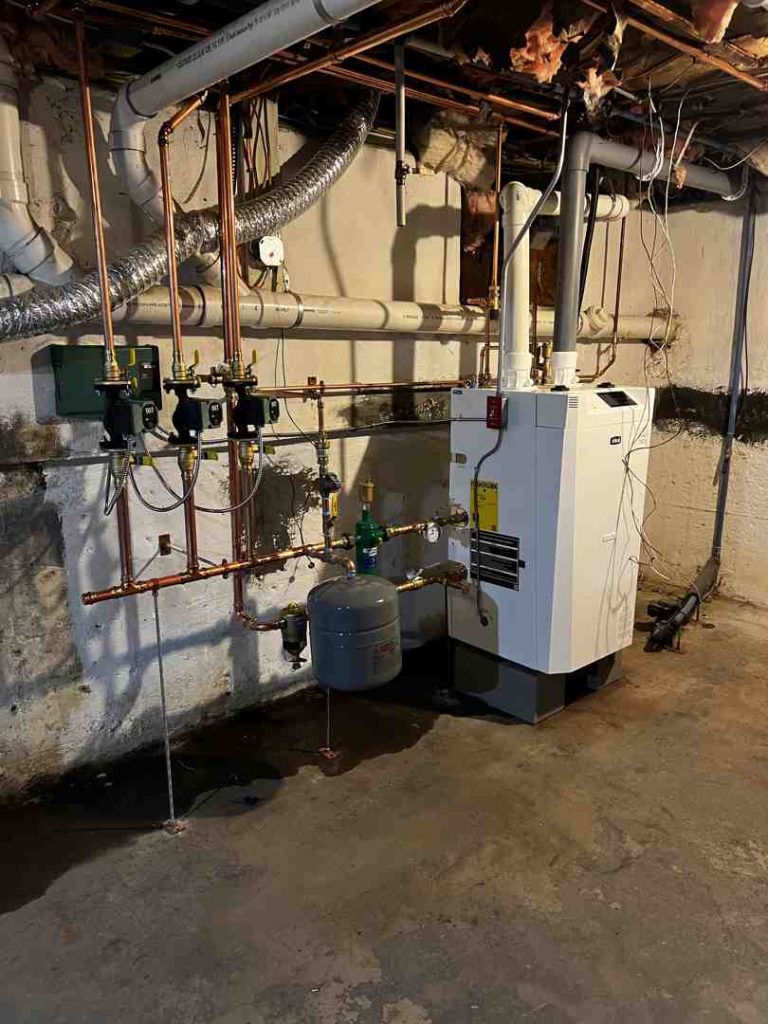
3. The PEX Manifold In a modern PEX system, we often install a “manifold”—think of it like a circuit breaker box, but for water. Each fixture (shower, toilet, sink) gets its own dedicated line. This means if your guest bathroom sink leaks, you can shut off the water to just that sink at the manifold while the rest of the house keeps running.

4. Secure Connections We use professional-grade crimp tools or “push-fit” connectors (like SharkBite for transitions) to ensure every joint is watertight. Unlike old-school soldering, there’s no risk of a fire, and the seal is instant.
5. Pressure and Leak Testing Before we close the walls, we “pressure test” the system. We slowly restore water and check every single connection with a dry cloth. We often leave the system under pressure for 24 hours to ensure there are no microscopic “pinhole” leaks.
6. Finishing Touches Once we are 100% sure the system is tight, we patch the drywall and restore your home to its original state (or better!).
Costs, Timelines, and Professional Solutions
Let’s talk numbers and time. Changing plumbing pipes is a significant investment. For a standard 2,000-square-foot home, the cost typically ranges from $3,000 to $16,000.
Why such a big range?
- Material: PEX is significantly cheaper ($0.50–$2.00 per foot) than copper ($4–$12 per foot).
- Home Size and Layout: A two-story home with three bathrooms costs more than a one-story ranch with one bath.
- Access: If we have to crawl through a tight crawlspace or cut through plaster and lath (common in older Providence homes), labor costs will rise.
Timeline Expectations:
- Small Home: 2–4 days.
- Medium Home: 4–7 days.
- Large/Complex Home: 7–10+ days.
Trenchless Alternatives
For main sewer lines, we sometimes use “epoxy lining.” This is a trenchless technology where we pull a resin-coated sleeve through your old pipe and “cure” it in place. It’s like creating a brand-new pipe inside the old one without digging up your beautiful North Scituate landscaping. This can save homeowners thousands in excavation and repaving costs.
DIY vs. Professional Pipe Replacement
Can you do this yourself? For a small spot repair—like replacing a leaky trap under the sink—DIY is a great way to save money. However, for a whole-house repipe, we strongly recommend hiring a licensed professional.
The DIY Risks:
- Permits and Codes: In Rhode Island, most major plumbing work requires a permit and an inspection. If you do it yourself and don’t follow the Uniform Plumbing Code, you could face fines or issues when you try to sell your home.
- Electrical Grounding: This is a big one! In many older homes, the electrical system is “grounded” to the metal water pipes. If you swap those for plastic PEX, you might accidentally un-ground your house, creating a massive fire and shock hazard. A pro knows how to install a jumper wire to keep you safe.
- Tool Costs: Professional crimping tools and high-end soldering kits can cost hundreds of dollars for a one-time job.
If you are dealing with an emergency right now, read our guide on how to fix burst water pipes in RI before you pick up a wrench.
Ensuring Long-Term System Health
Once you’ve finished changing plumbing pipes, you want that investment to last. Here is how we ensure longevity:
- Tube Clamps: We use specialized clamps to secure pipes to the framing. This prevents “pipe chatter” and reduces wear and tear on the joints caused by vibration.
- Water Pressure Regulators: High water pressure (above 80 PSI) can “shred” your fixtures and cause early pipe failure. We always check and calibrate your pressure regulator.
- Pipe Insulation: In our region, freezing is the #1 enemy. We insulate pipes in unconditioned spaces (like basements and attics) to prevent the “freeze-thaw” cycle that leads to bursts.
- Sediment Management: Flushing your water heater every 6–12 months prevents sediment from entering your new pipes and causing clogs.
For more local advice, check out our 7 plumbing tips to prevent disasters in Rhode Island.
Conclusion and Next Steps
Changing plumbing pipes might feel like a daunting task, but it is one of the most rewarding upgrades you can make for your home’s health and your own peace of mind. No more worrying about a flood while you’re at work, and no more “rusty” showers in the morning.
At Prime Heating & Cooling, we’ve spent the last 20 years helping our neighbors in North Providence, Lincoln, Warwick, and across Rhode Island navigate these big home decisions. We pride ourselves on offering energy-efficient, reliable solutions with a customer-first approach. Whether you need a 24/7 emergency repair or a comprehensive quote for a whole-house PEX repipe, our skilled technicians are here to help.
Don’t wait for a disaster to strike. Protect your home and your family today. Schedule expert plumbing services today with Prime Heating & Cooling and let’s get your home’s plumbing back in “prime” condition!


